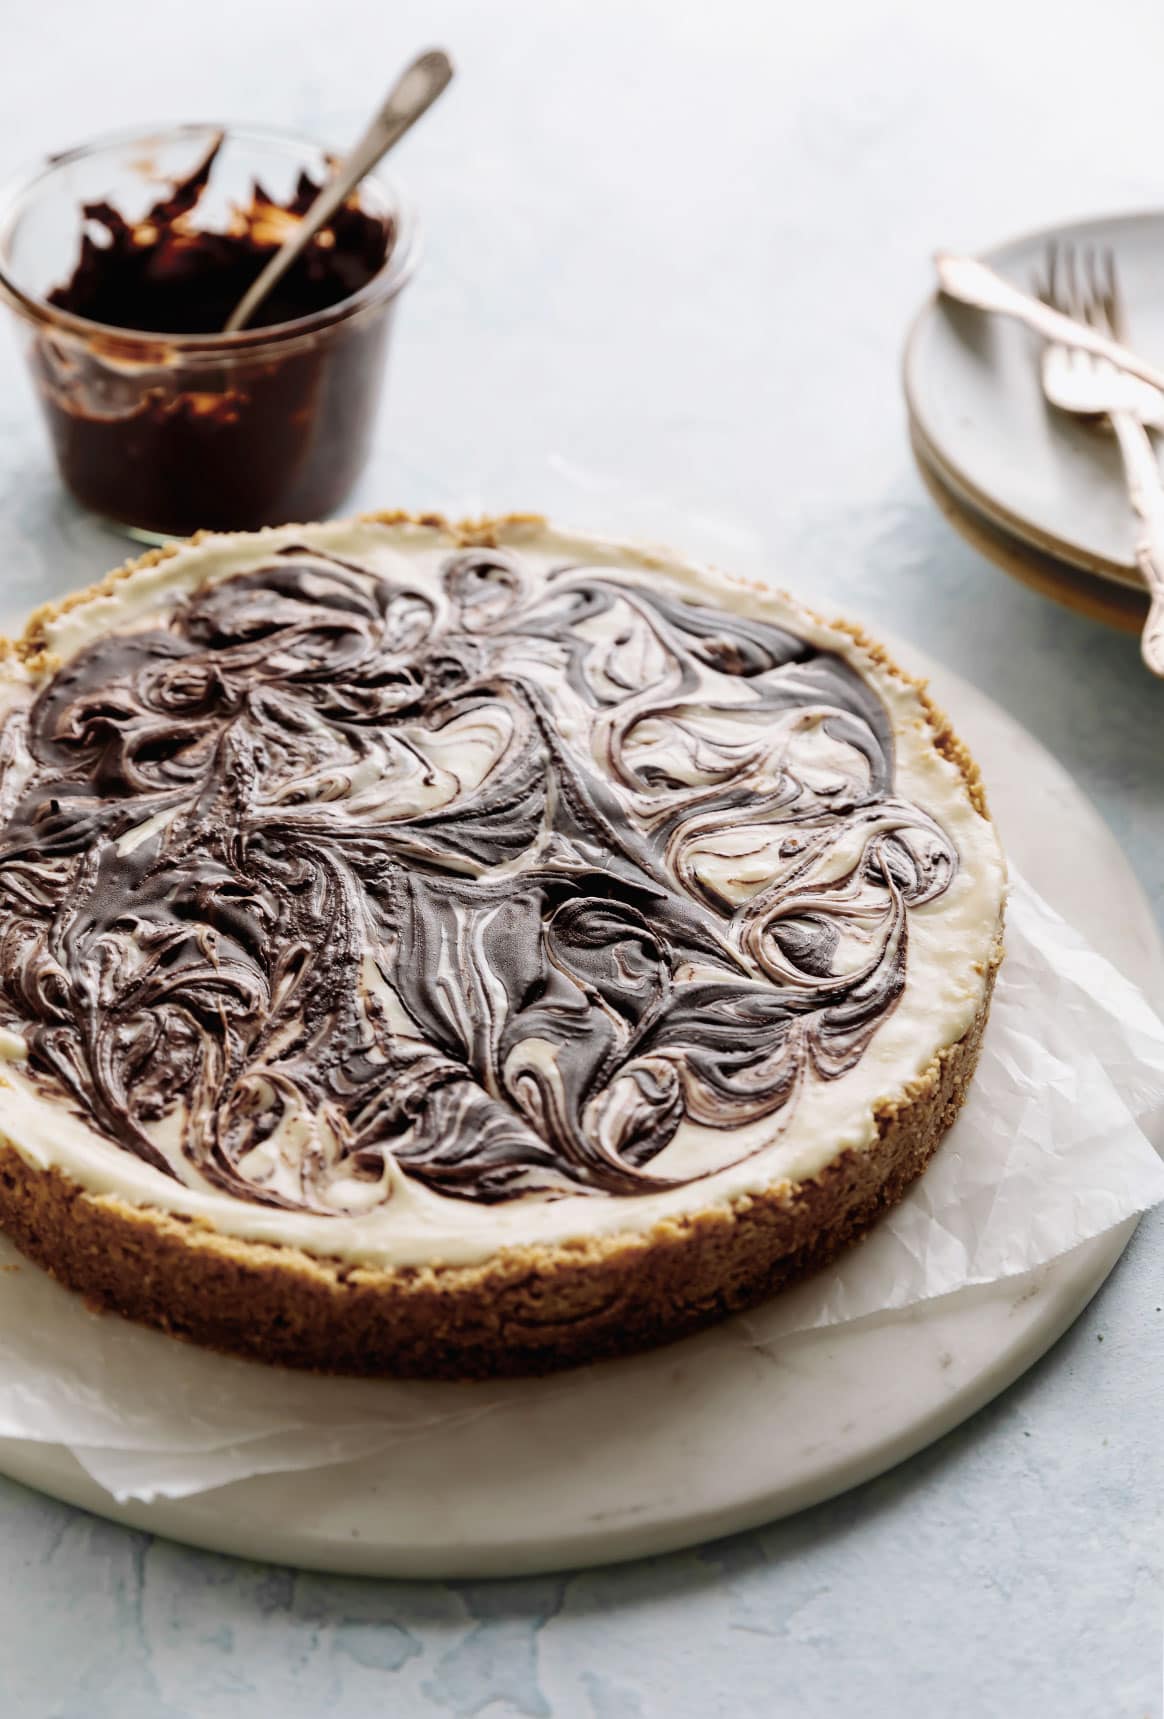
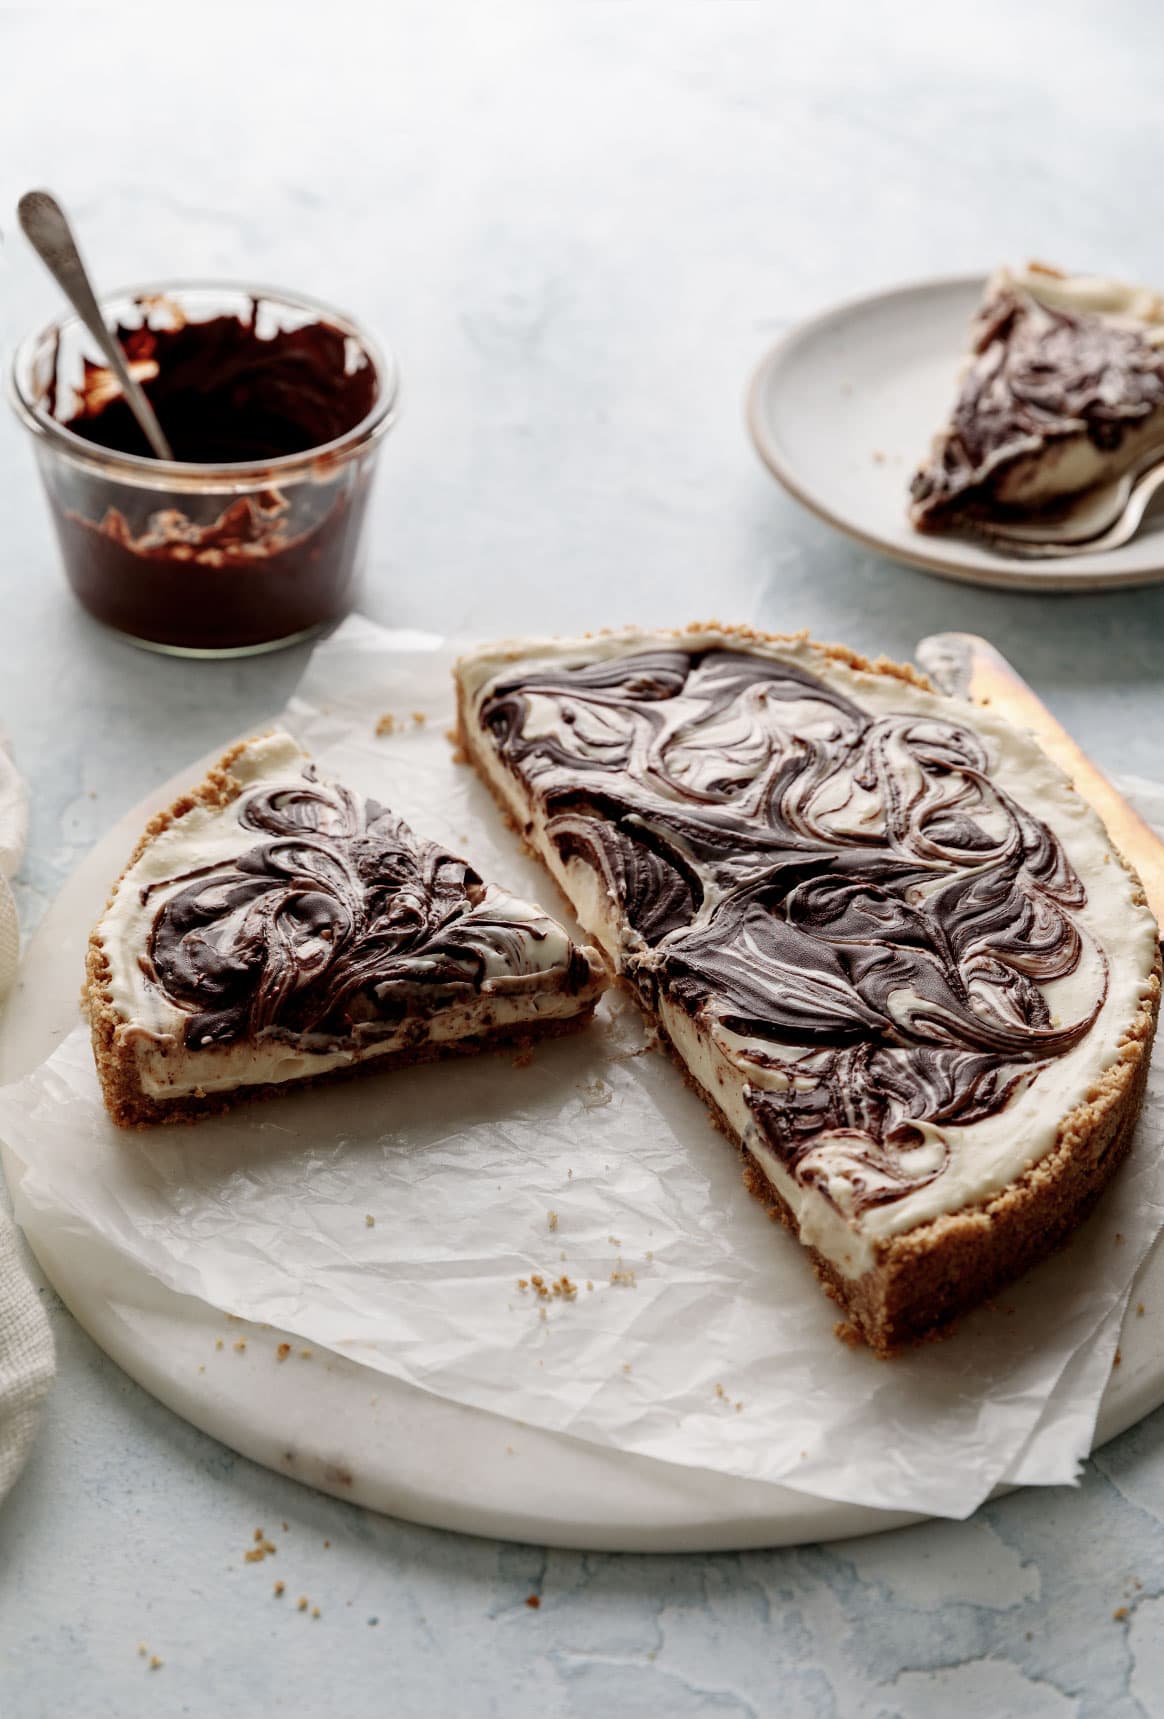
No-Bake Chocolate Swirl Cheesecake
The easiest no-bake chocolate swirl cheesecake recipe made with a graham cracker crust and cream cheese filling. Less than 10 ingredients and ready in a few minutes.
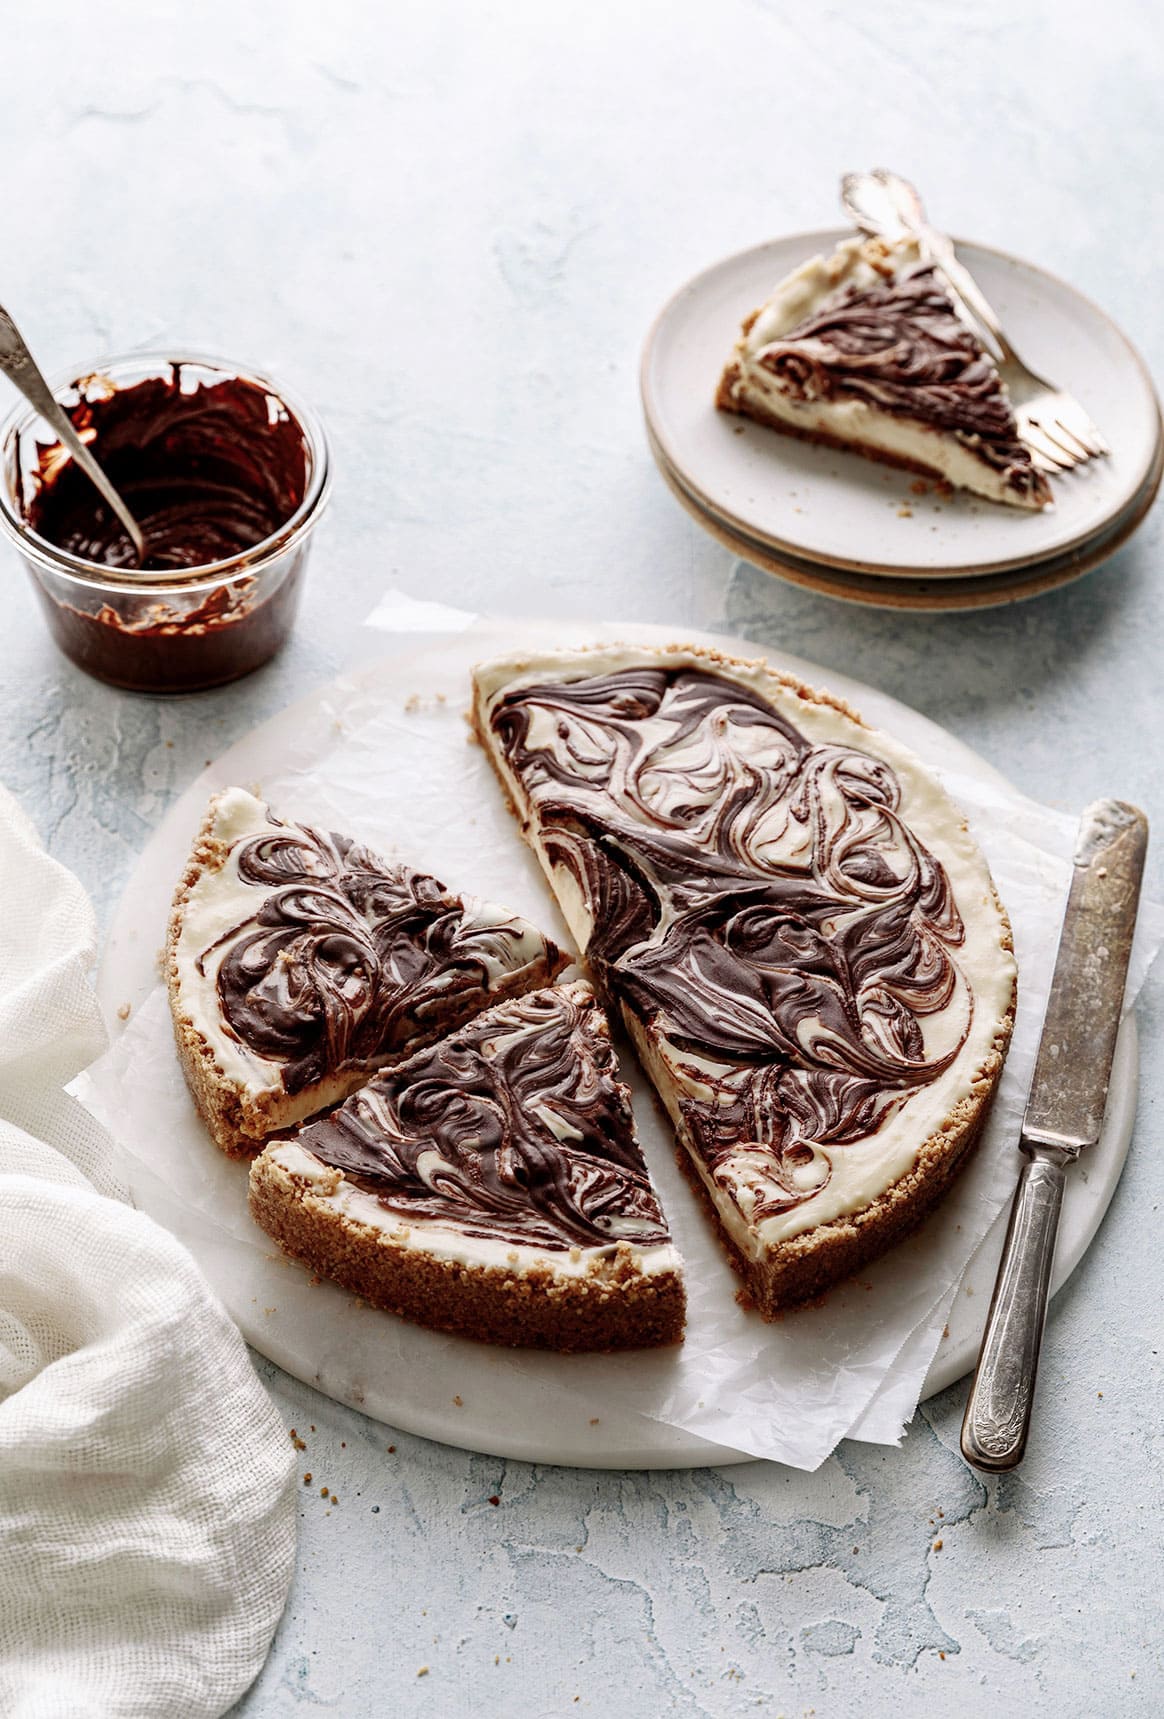
This Chocolate Swirl Cheesecake is perfect for anyone starting to bake and kind of afraid of the kitchen. t’s super simple to make and hard to mess up, and the swirls make it extra pretty.
This recipe isn’t too sweet; the dark chocolate is perfectly balanced with the condensed milk. I went heavier on the chocolate, but you can use half of what’s called for in the recipe card (so 2.5 oz), if you prefer.
How to make a Perfect No-Bake Chocolate Swirl Cheese Cake
Here are my go-to tips to make a perfectly smooth no-bake cheesecake.
- Make sure you’re using full-fat cream cheese. I haven’t tested this recipe with a low-fat cream cheese and can’t guarantee it’ll turn out good!
- Use softened/room temperature cream cheese. I take mine out of the fridge about 2 hours before I start baking. You know it’s ready when it’s still cool to the touch, but when pressed with your finger, it should leave an indentation.
- Use dark chocolate instead of milk chocolate, because milk chocolate contains more sugar and will make the cheesecake overly sweet . I used 70% cocoa.
- Melt the chocolate using a double-broiler technique. Here’s an easy explanation if you haven’t done it before.
Ingredients for a No-Bake Cheesecake
For this recipe you’re going to need only 9 ingredients:
- Graham Cracker crumbs. I simply pulsed the crackers using a food processor.
- Butter
- Sugar
- Salt
- Cream cheese
- Condensed milk
- Dark chocolate
- Vanilla
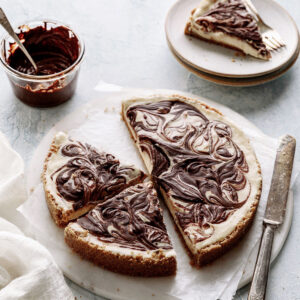
How to make a Chocolate Swirl
To make the chocolate swirl, melt the chocolate in a double broiler. This means placing the chocolate in a heatproof bowl over simmering water. Stirring until it melts and is smooth and glossy. To make the swirls, spoon melted and slightly cooled chocolate over the filling. Use a knife or skewer and go around the cheesecake in an 8-figure motion.
How to store a No-Bake Cheesecake
No-bake cheesecake will keep for up to 4 days refrigerated. Cover with foil or plastic wrap.
If you love this recipe, you might also love:
I’m so happy you’re making one of my recipes, and would love to see how it turns out! Share it on Instagram using #yogaofcooking so I can see it, it always makes my day! Or leave a comment below!
Happy Baking! x
No-Bake Chocolate Swirl Cheesecake
Ingredients
- For the Crust
- 1 1/2 cups graham cracker crumbs
- 5 tbsp unsalted butter melted
- 1/4 cup granulated sugar
- 1 tsp kosher salt
- For the Filling
- 2 8 z packages full-fat cream cheese room temp
- 1 14 oz can 1 1/4 cups sweetened condensed milk
- 1 tsp vanilla extract
- 5 oz dark chocolate I used 70%, roughly chopped
Instructions
- For the Crust
- In a medium bowl, combine the graham cracker crumbs, sugar, salt and melted butter. Stir until mixture resembles wet sand. press the crumb mixture into a 9-inch springform pan, spreading it 11/2 to 2 inches up the side. Chill crust in the freezer for 15 minutes. Alternatively, you can bake the crust at 350F for 10 minutes, and let cool.
- For the Filling
- Melt the chocolate in a heatproof bowl set over a pan of simmering water (double-broiler). Stirring occasionally until chocolate melts and is smooth and glossy. Carefully, remove from heat, and avoid getting any water in the bowl.
- To make the filling, in the bowl of a stand mixer with the paddle attachment, on medium speed, beat the softened cream cheese until smooth. Add the condensed milk and vanilla, beating on low until combined.
- Pour the filling over the chilled crust, and spoon the melted chocolate on top. Using a skewer or knife, make swirls in an 8-figure motion, going around the filling 2-3 times.
- Cover with plastic wrap and place in the fridge for 2-4 hours before serving.